A failed tow truck winch can turn a routine recovery into a dangerous roadside problem. The drum may stop suddenly, the motor may hum without pulling, or the cable may refuse to spool evenly. In 2026, modern winches often combine electric controls, hydraulic systems, wireless remotes, and electronic protection circuits. That complexity demands a methodical inspection, not guesswork.
This guide explains How to troubleshoot a tow truck winch failure through practical, field-tested checks. It begins with visible symptoms and basic safety controls. Then, it examines battery voltage, ground connections, fuses, solenoids, remote signals, hydraulic pressure, and cable condition. John Hawkins, a veteran tow-equipment technician, says, “A winch usually tells you where the problem starts, if you listen before replacing parts.” That advice matters. A clicking solenoid and a silent motor do not point to the same fault.
Small details can reveal larger failures. A warm cable terminal may indicate resistance. Loose mounting bolts can create vibration and poor grounding. Flattened cable strands may signal improper spooling or excessive side loading. Still, diagnosis is not always clean. A weak battery can imitate a failed motor, while a damaged control switch can appear intermittent. I have found that rushed inspections often miss simple connections. That is worth remembering. The safest approach is to isolate each circuit, follow the manufacturer’s service instructions, and stop when the load, equipment, or working area becomes uncertain.
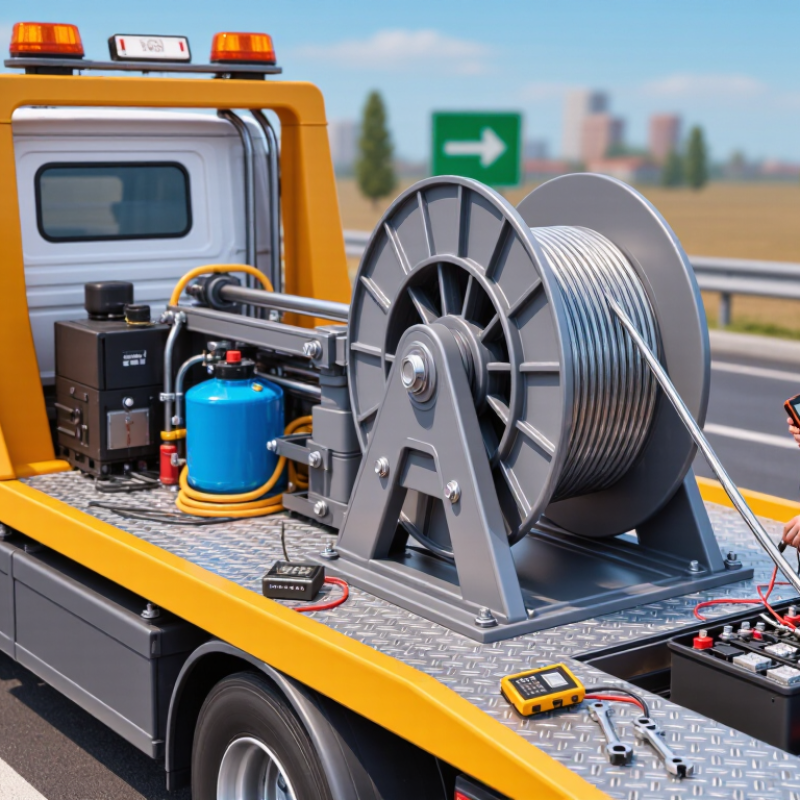
How to Troubleshoot a Tow Truck Winch Failure in 2026?
Classify Electric or Hydraulic Failure Modes Using SAE J706 Winch Ratings
SAE J706 provides a useful reference for rated line pull, drum position, and winch performance. It is not a fault-code system. Compare the observed pull with the published rating before replacing parts. Measure at the first drum layer, where line pull is usually highest. A fully loaded drum can reduce available force sharply. Stop there if the result seems unsafe.
Electric failures often begin with low voltage, loose grounds, overheated solenoids, or damaged motor brushes. Check battery voltage while operating the winch, not only at rest. A clicking relay with no drum movement suggests voltage drop or poor contacts. Slow movement with hot cables points toward excessive resistance. I have seen technicians blame the motor too early. The cable connection was the real fault.
Hydraulic failures require a different path. Inspect fluid level, filter condition, hoses, and valve response. A slipping hydraulic motor may show weak pull while pressure remains below its rated value. Compare pressure and flow with the winch specifications, then relate the result to SAE J706 line-pull expectations. A noisy pump can indicate aeration. Small leaks matter. They can hide major pressure loss. Record drum layer, load condition, temperature, and test readings. Without those details, a rating comparison becomes guesswork.
SAE J706 winch ratings are commonly referenced at the first rope layer. As more rope is wound onto the drum, the effective radius increases and available line pull decreases. The chart uses a calculated 5,000 lbf first-layer reference to show this mechanical effect without using company or brand data.
Electric failure mode: inspect battery voltage under load, cables, ground connections, contactor operation, and motor current before replacing the motor. Hydraulic failure mode: inspect fluid level and temperature, filters, relief-valve settings, pump output, hydraulic pressure, and the hydraulic motor. A measured first-layer pull below the applicable SAE J706 rating indicates a performance problem, but the rating must be verified with the winch manufacturer’s test procedure and approved equipment.
When a tow truck winch stops moving, check the electrical supply before replacing parts. A weak battery can sound like a failed motor. Set a reliable multimeter to DC voltage. Measure directly across the battery terminals with the engine off. A healthy 12-volt battery should show about 12.6 volts at rest. For a 24-volt system, expect approximately 25.2 volts. Lower readings deserve attention, especially below 12.2 volts on a 12-volt system. Confirm the battery has rested before judging it. Surface charge can mislead you.
Start the engine and measure again. Charging voltage should usually remain between 13.7 and 14.7 volts on a 12-volt system. A 24-volt system should generally produce about 27.4 to 29.4 volts. Then operate the winch briefly while watching the meter. A sharp voltage collapse suggests weak batteries, corroded terminals, poor grounding, or excessive cable resistance. I have seen clean-looking cables fail under load. Appearance is not proof. Check both positive and negative voltage drop paths, not only the battery.
Tips: Keep the probes firmly on the terminals. Inspect warm connectors after a short test. Heat often reveals resistance. If voltage remains correct, test the control relay, solenoid, fuse, and motor separately. Do not bypass protective devices during diagnosis. I once blamed the winch motor too quickly; the real fault was a loose ground connection. Record each reading before replacing anything.
A silent winch does not always have a failed motor. Start with a charged battery and a digital multimeter. Set the winch to a controlled load, then measure voltage directly across the battery posts. Record the reading before testing the circuit.
Place the probes across the positive battery post and the winch motor’s positive terminal. Activate the winch briefly under load. A reading near or above 0.5 volts indicates excessive resistance in the positive cable, terminal, solenoid, or circuit breaker. Repeat the test on the ground side. Move one probe from the negative battery post to the motor housing or ground terminal. This separate reading can expose a corroded ground strap that looks clean outside.
Do not test resistance with power applied. High-current connections may heat quickly, so stop if insulation softens or a terminal becomes unusually hot. Check loose lugs, flattened cable ends, hidden corrosion, and damaged crimp areas. A voltage reading can change when the cable moves, which suggests an intermittent fault.
The 0.5-volt target is a practical diagnostic limit, not a universal replacement for service data. Cable length, current demand, and system design still matter. I have seen technicians replace a motor too early because they measured open-circuit voltage only. That test missed the real problem. Recheck the circuit under load after every repair, and compare the new reading with the original measurement.
When a tow truck winch fails, begin with a controlled inspection, not repeated switches. Disconnect power and keep everyone away from the rope path. Check the rope for crushed strands, birdcaging, heat damage, cuts, and severe abrasion. Synthetic rope may look clean while hiding internal weakness. Steel rope can develop broken wires near the hook or drum.
Inspect the hook next. Its throat must not be opened, twisted, or deeply gouged. Confirm the latch closes fully. Examine the fairlead for sharp edges, loose rollers, or blocked movement. A damaged fairlead can cut rope during an angled pull. On the drum, verify tight layering and sufficient wraps remain. Loose spooling creates crushing and sudden slipping. Stop immediately.
Compare every part with its working load limit, or WLL. The complete system must follow the lowest-rated component, not the winch’s largest number. Review the winch data and the applicable SAE J706 requirements for capacity, construction, and testing. SAE J706 is a useful technical reference, but it does not excuse missing manufacturer instructions or damaged equipment. Never confuse WLL with breaking strength.
I once underestimated how much side loading changed rope behavior. That mistake deserves repeating. Check alignment, load angle, and drum position before testing. If the rope, hook, fairlead, or drum shows doubt, remove the winch from service and request inspection by a qualified technician. Repair records should include the defect, measured damage, and final load verification.
| Inspection Area | Typical Failure Symptom | What to Inspect | Acceptance or Removal Guidance | Corrective Action | WLL / SAE J706 Consideration |
|---|---|---|---|---|---|
| Wire Rope or Synthetic Rope | Rope slips, breaks, flattens, kinks, bird-cages, or will not wind evenly. | Look for broken wires, severe abrasion, corrosion, heat damage, melted fibers, cuts, crushed sections, knots, and irregular winding. Check the rope termination and the number of wraps remaining on the drum. | Remove from service when damage exceeds the rope manufacturer’s discard criteria, when the termination is loose, or when the rope has suffered shock loading or an unknown overload. Do not use a damaged rope merely because it still lifts a test load. | Replace with the correct rope type, diameter, length, and rated capacity. Re-spool under controlled tension with the layers seated tightly and evenly. | The rope assembly must have a WLL suitable for the intended line pull and configuration. SAE J706 addresses vehicle-mounted winch performance and testing; it does not replace the rope manufacturer’s inspection and discard requirements. |
| Hook and Safety Latch | Hook opens under load, twists, will not seat correctly, or becomes difficult to rotate. | Inspect the hook throat, tip, bowl, shank, eye, latch, retaining pin, and swivel. Check for cracks, deformation, excessive throat opening, corrosion, and side loading. | Remove from service if cracked, bent, visibly stretched, excessively worn, or if the latch does not close and retain the attachment point. Never straighten or weld a damaged load hook. | Replace the hook or complete termination assembly with a compatible, rated component. Position the hook in the center of the attachment point and avoid side loading. | The hook WLL must not be lower than the applicable line or rigging WLL. The lowest-rated component controls the allowable working load. |
| Fairlead | Rope frays at the front of the winch, develops flat spots, or binds during angled pulls. | Check rollers or the hawse opening for sharp edges, seized rollers, grooves, cracks, missing fasteners, excessive clearance, and incorrect alignment with the drum. | The fairlead must allow smooth rope movement without cutting, pinching, or forcing the rope against an edge. Replace damaged rollers, bushings, or fairlead plates. | Repair or replace the fairlead and confirm that it is securely mounted. Reduce side pull by repositioning the vehicle, using a snatch block, or establishing a straighter line. | Fairlead alignment affects rope loading and wear but does not increase the winch’s rated WLL. Do not use a fairlead to justify a load above the winch rating. |
| Drum and Rope Spooling | Drum rotates but rope piles on one side, slips at the anchor, or becomes crushed between layers. | Inspect drum flanges, drum surface, rope anchor, fasteners, welds, bearings, and the first layer of rope. Confirm that the rope is wound tightly and that the drum is not cracked or distorted. | Stop operation if the rope anchor is loose, the drum is damaged, the flange is deformed, or the rope is crossing and crushing under load. | Secure the rope according to the winch design, re-spool under tension, and replace damaged drum components. Keep the rope distributed across the drum whenever practical. | Rated line pull generally changes with the number of rope layers on the drum. Use the applicable manufacturer rating and SAE J706 test data rather than assuming the first-layer rating applies to every layer. |
| Electrical Supply and Motor | Motor is silent, clicks, runs slowly, overheats, or stops under load. | Check battery condition, system voltage, terminals, ground path, cables, circuit protection, contactor, remote switch, motor connections, and signs of heat damage. Measure voltage at the motor while operating, using the equipment service procedure. | Connections must be clean, tight, correctly sized, and protected from chafing. A repeated voltage drop, burning smell, or overheated cable requires shutdown and diagnosis before further loading. | Recharge or replace the battery as required, clean and tighten connections, repair damaged wiring, and replace failed switching or motor components with correctly rated parts. | Electrical repairs restore available power but do not change the mechanical WLL or rated line pull. Winch performance should be verified under the applicable SAE J706 test conditions where required. |
| Gear Train, Brake, and Clutch | Winch free-spools unexpectedly, makes grinding noises, back-drives, or cannot hold a stationary load. | Inspect gear noise, oil or grease leakage, clutch engagement, brake holding ability, shaft movement, and housing damage. Check only according to the service instructions for the specific winch design. | Do not operate if the brake will not hold, the clutch will not fully engage, or internal damage is suspected. A brake that slips under a secured test load is a critical failure. | Isolate the winch, inspect or rebuild the affected assembly using approved procedures, and perform a controlled functional test before returning it to service. | Holding capacity and line pull must remain within the winch’s rated limits. A functioning brake does not permit lifting or pulling beyond the published WLL. |
| Load, Anchor, and Pull Angle | Winch stalls even though the rope and motor appear serviceable, or the vehicle moves unexpectedly. | Evaluate load weight, rolling resistance, slope, mud or snow, attachment strength, anchor alignment, snatch-block arrangement, and whether the vehicle is properly secured. | Stop when the required line pull is unknown, the anchor is unstable, the pull is sharply angled, or any component may be overloaded. Keep people out of the bight and the direct line of a loaded rope. | Reduce resistance, improve alignment, use suitable mechanical advantage, secure the tow vehicle, and select rigging with adequate capacity and compatible connection points. | Apply the lowest WLL in the complete system, including winch, rope, hook, shackles, snatch block, anchor, and attachment point. Do not confuse breaking strength with WLL. |
| Post-Repair Verification | The winch operates after repair but reliability under load is uncertain. | Verify fasteners, rope direction, hook latch, fairlead alignment, electrical polarity, brake holding, emergency controls, and smooth in-and-out operation. Record the inspection date and findings. | Return to service only when no critical defect remains and a competent person confirms safe operation. Stop immediately if abnormal noise, heat, slipping, or rope damage reappears. | Conduct a controlled no-load and low-load functional check, followed by any required proof or performance test under the applicable service procedure. | Compare results with the winch rating plate, manufacturer instructions, and applicable SAE J706 requirements. The WLL remains limited by the weakest component and the actual operating configuration. |
A failed winch needs a controlled diagnosis, not repeated button presses. Park on level ground, apply the vehicle brake, and isolate unnecessary movement. Keep everyone outside the line of pull. The 2022 FMCSA Large Truck and Bus Crash Facts report recorded 5,837 fatal crashes involving large trucks and buses. That figure does not prove winch causation, but it reinforces disciplined recovery practices.
Test the remote first. Check its battery, wiring, connector, and emergency stop circuit. Then measure voltage at the solenoid while pressing “in” and “out.”
A sharp voltage drop suggests resistance, a weak connection, or a damaged solenoid. Do not guess. Record readings. Test the motor with the manufacturer’s specified current limits, because excessive draw can indicate worn brushes, seized bearings, or a mechanical overload.
The brake deserves a separate check. With the rope secured and no person near the load, verify that the drum holds without creeping. Inspect the rope, fairlead, and drum for crushing or uneven winding.
SAE J706 provides guidance for winch performance and rating considerations, but field conditions still matter. A remote may work intermittently after moisture exposure. That happened to me once, and I blamed the motor too quickly.
After repairs, perform a low-load retest, stop immediately if noise, heat, or brake slip appears, and document every result.
It should usually read about 12.6 volts after resting. Below 12.2 volts deserves attention. Surface charge can mislead you.
A 12-volt system should generally show 13.7 to 14.7 volts. A 24-volt system should show about 27.4 to 29.4 volts. Record the reading.
A sharp drop may indicate weak batteries, corrosion, poor grounding, or excessive cable resistance. Measure while the winch works briefly. Open-circuit voltage alone can hide the fault.
Place one probe on the positive battery post. Place the other on the motor’s positive terminal. Activate the winch briefly under load. A reading near or above 0.5 volts suggests excessive resistance.
Place one probe on the negative battery post. Place the other on the motor housing or ground terminal. A high reading may reveal a corroded ground strap. Clean-looking cables can still fail.
Inspect the rope, hook, fairlead, drum, connectors, and cable ends. Look for crushed strands, broken wires, sharp edges, loose rollers, and poor winding. Stop testing if damage appears.
Check the rope against its working load limit, not its breaking strength. The whole system follows its lowest-rated component. A hook must not be twisted, opened, or deeply gouged. Replace doubt with inspection.
Do not bypass protective devices or test resistance on an energized circuit. Keep tests short, and stop if terminals become unusually hot. I once blamed the motor too quickly. The loose ground was the real fault.
How to troubleshoot a tow truck winch failure begins with identifying whether the system uses an electric or hydraulic drive and matching the symptoms to the appropriate failure mode. Confirm the battery and charging system first: a healthy 12-volt or 24-volt system should show about 12.6 volts at rest and 13.7–14.7 volts while charging. During operation, measure voltage at the winch under load and investigate excessive loss, using approximately 0.5 volts as a practical diagnostic target for high-current circuits.
Next, inspect the rope, hook, fairlead, and drum for damage, incorrect winding, or conditions that exceed the working load limit and applicable SAE J706 winch ratings. Check the solenoid or control valve, motor, brake, connections, and remote control individually rather than replacing parts without testing. After correcting faults, perform a controlled retest with the vehicle secured, the load within rated limits, and all personnel positioned safely. Record the readings and symptoms to support future maintenance and reduce repeat failures.

Yale Truck