7 Best Ways to Disinfect a Medical Emergency Vehicle?

Time:2026-09-25 Author:Charlotte
0%

A medical emergency vehicle can look clean while germs remain on the stretcher rails, door handles, monitor controls, or seat-belt buckles. These surfaces are touched repeatedly during urgent care, sometimes with gloved hands and limited time. Effective disinfection starts with removing visible soil; disinfectant cannot work reliably through dirt or body-fluid residue. Small details matter. So does choosing a product compatible with the vehicle’s equipment and following its label, including the required wet contact time.

How to disinfect a medical emergency vehicle properly depends on the vehicle’s surfaces, the type of contamination, and current infection-control procedures. A practical routine should cover hand hygiene, appropriate protective equipment, safe waste handling, cleaning before disinfection, and careful attention to high-touch areas. Crews should also allow suitable ventilation and avoid spraying products near patients, electronics, or open equipment unless the manufacturer permits it. There is no single shortcut that fits every ambulance. A wipe that works on a rail may damage a screen.

The seven approaches in this guide focus on repeatable steps, from preparing the work area to checking that treated surfaces stay wet for the labeled time. They are intended to support—not replace—your organization’s infection-prevention policies, product instructions, and equipment guidance. Even a well-designed checklist can be missed during a demanding shift; that deserves honest review, not blame. Consistent training and clear records help teams spot gaps and improve the next cleaning. Cleaning takes time. Rushing can undo it.
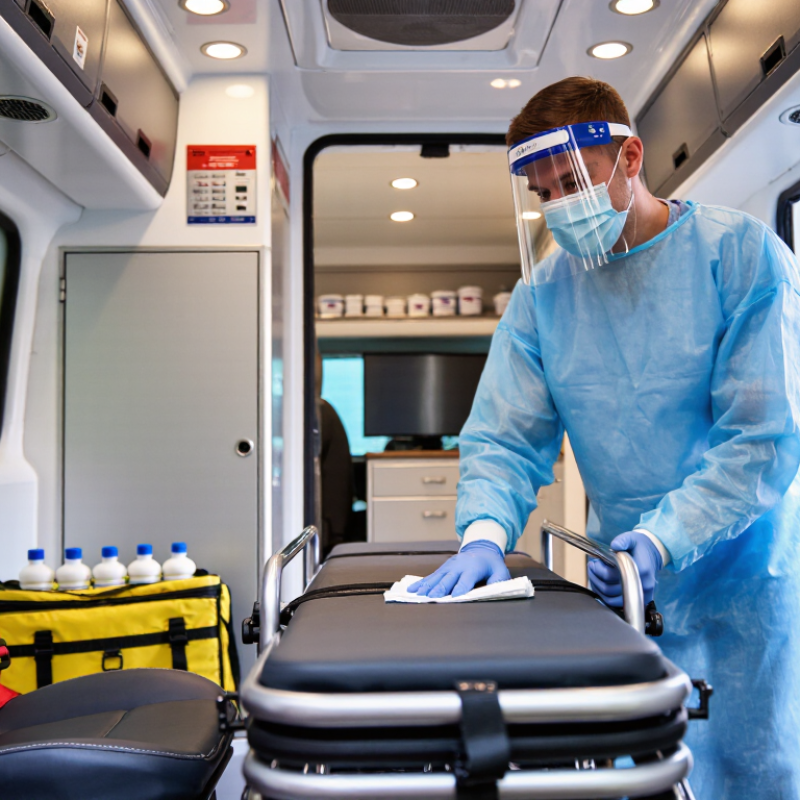
7 Best Ways to Disinfect a Medical Emergency Vehicle?

Prepare the Vehicle and Choose Compatible, Approved Disinfectants

Before disinfecting a medical emergency vehicle, park it in a safe, well-ventilated area and follow your service’s cleaning procedure. Wear the protective equipment specified for the task. Remove waste and visible soil with the appropriate cleaner; disinfectants may not work well on dirty surfaces. Check the product label and vehicle guidance to confirm the disinfectant is approved for each material, including seats, screens, and stretcher rails. Small details matter.

Tips: Keep a simple surface checklist near the cleaning supplies. Pay attention to door handles, buckles, control panels, and other frequently touched areas. Use a clean cloth for each surface group, and never mix cleaning products. Do not guess. Follow the label’s wet contact time, even when the vehicle needs to return to service quickly.

Allow treated surfaces to dry as directed, and ventilate the compartment before restocking it. If a surface is cracked, damaged, or reacts unexpectedly, pause and consult the vehicle or equipment guidance before continuing. It is tempting to treat every surface alike, but that shortcut can damage materials or leave missed areas. A quick second check can catch both.

Remove Soil Before Disinfecting Patient-Care Surfaces

Disinfection works best on a clean surface. In an emergency vehicle, blood, dust, lotion, and other visible soil can interfere with disinfectant contact. Put on appropriate protective equipment, then remove soil from patient-care surfaces with a compatible cleaning solution and fresh cloth. Use deliberate strokes, not a quick wipe. Small details matter.

Pay attention to stretcher rails, seat-belt buckles, door handles, and the edges around equipment. Fold the cloth to expose a clean section as it becomes soiled. Replace it when necessary; spreading residue from one surface to another defeats the purpose. For screens, cables, and other sensitive equipment, follow the equipment maker’s cleaning instructions. A damp cloth is not automatically safe for every surface.

When visible soil is gone, apply an appropriate disinfectant according to its label. Keep the surface visibly wet for the stated contact time; wiping it dry too soon may reduce effectiveness. Never mix cleaning products. It is tempting to rush between calls, and crews will not get every tiny seam perfect every time. Still, a consistent cleaning routine makes missed areas less likely.

Disinfect High-Touch Areas Between Patient Transports

7 Best Ways to Disinfect a Medical Emergency Vehicle?
Disinfect High-Touch Areas Between Patient Transports

A reliable turnover begins with the surfaces hands touch most: grab rails, door handles, cot rails, restraint buckles, monitor controls, radio microphones, and cabinet pulls. Wear appropriate protective equipment and remove visible soil before applying disinfectant. Dirt and body fluids can interfere with effective disinfection. Small details matter. Check seams, buckle edges, and the underside of handles, where residue can hide.

Use a disinfectant approved for the intended pathogens and compatible with each surface. Follow its label, especially the required wet contact time; wiping it dry too soon may reduce effectiveness. Let it stay wet. Apply products to cloths when directed, rather than spraying near screens, vents, or electrical connections. Never mix cleaning chemicals. Work from cleaner areas toward dirtier ones, and change cloths when they become soiled. A simple checklist can prevent missed touchpoints during a rushed handoff. Still, checklists are not a substitute for judgment: damaged upholstery or a visibly contaminated restraint may need extra attention under local protocols. Record the completed turnover, and report any equipment that cannot be safely cleaned before the next transport.

7 Best Ways to Disinfect a Medical Emergency Vehicle? - Disinfect High-Touch Areas Between Patient Transports

# Disinfection method High-touch areas to address How to do it between transports Key safety point
1 Clean first, then disinfect Visible soil on work surfaces, stretcher rails, and frequently handled equipment Remove visible soil with detergent and water or a compatible cleaner. Then apply an appropriate disinfectant to the cleaned surface. Organic material can interfere with disinfection. Follow the product label and local infection-control procedures.
2 Disinfect hand-contact points Door handles, grab rails, cabinet pulls, seat-belt buckles, and frequently used switches Wipe each compatible surface with a disinfectant labeled for the intended use and target organisms. Keep the surface visibly wet for the full contact time stated on the product label.
3 Disinfect the stretcher and patient-contact surfaces Stretcher mattress and frame, side rails, handles, and other reusable patient-contact surfaces After removing linens and disposable items, clean and disinfect the stretcher surfaces according to the equipment and disinfectant instructions. Use products compatible with the mattress and equipment materials; allow surfaces to dry as directed before reuse.
4 Address controls and shared equipment Monitor controls, device handles, reusable cuffs, and other shared items touched during care Clean and disinfect reusable items between patients using the method specified by the equipment manufacturer and your service protocol. Do not spray liquid into openings or immerse electronic devices unless their instructions specifically allow it.
5 Use the right product for the exposure Surfaces potentially contaminated with blood or other body fluids Follow the service’s exposure-control procedure: wear required PPE, contain and remove the spill safely, then clean and disinfect with a product labeled for the relevant hazard. Never mix cleaning chemicals. Follow the product label, safety data sheet, and applicable workplace procedures.
6 Work systematically and avoid cross-contamination Patient-care compartment surfaces, moving from cleaner areas toward more soiled areas Use fresh wipes or cloths as needed, follow a consistent route, and avoid reusing a contaminated wipe on another surface. Change gloves when contaminated and perform hand hygiene after removing PPE.
7 Ventilate, verify, and document The patient-care compartment and all completed high-touch surfaces Ventilate as appropriate for the product used, check that required contact times were met, and record completion according to service policy. Do not return the vehicle to service until required cleaning steps are complete and surfaces are ready for use.

Reminder: Select disinfectants registered or otherwise authorized for the intended use in your jurisdiction, follow label contact times, and check compatibility with vehicle and medical-equipment manufacturers’ instructions. Apply your organization’s infection-prevention and exposure-control procedures.

Clean Medical Equipment and Reusable Supplies Safely

Reusable medical equipment needs cleaning before disinfection. Organic soil can shield microbes from disinfectants. Wear appropriate protective equipment, then remove visible dirt with a compatible detergent and clean cloth. Pay close attention to monitor buttons, stretcher rails, handles, and cable joints. Small details matter. Keep used supplies apart from clean ones in clearly marked containers.

Follow each device’s instructions for use and the disinfectant label. Check material compatibility, dilution, and required wet contact time; the surface must stay wet for that full period. Never immerse electronics unless the manufacturer permits it. The CDC’s Guideline for Disinfection and Sterilization in Healthcare Facilities distinguishes equipment by infection risk and recommends processing according to intended use. The WHO’s 2022 Global Report on Infection Prevention and Control estimates that 7 of every 100 patients in high-income acute-care hospitals acquire at least one healthcare-associated infection; this is not a vehicle-specific figure, but it underscores why reliable cleaning matters. Not every surface.

In practice, rushed handoffs can leave damp cloths or unclear reprocessing status. Pause to check hinges, seams, and reusable cuffs, then record the item, product, and completion time. If instructions are missing or a surface remains visibly soiled, set the item aside for guidance rather than guessing. A checklist helps, but it will not catch every missed spot. That deserves review.

7 Best Ways to Disinfect a Medical Emergency Vehicle

A safe cleaning and disinfection workflow for vehicle surfaces, medical equipment, and reusable supplies.

The bar values identify each step’s position in the workflow; they do not indicate time, disinfectant strength, or effectiveness. Remove visible soil before disinfection, follow the disinfectant label’s wet contact time, and follow the equipment manufacturer’s instructions for reusable items.

Treat Fabrics, Manage Waste, and Ventilate the Vehicle

After a patient transfer, check fabric seats, restraints, and curtains for visible soil. Wear the protective equipment required by your service’s infection-control procedure. Blot spills carefully rather than rubbing them deeper into the fibers. Remove detachable fabric items for laundering when the care instructions allow it. Not every surface can be washed.

For upholstery that cannot be removed, use a disinfectant approved for that surface and follow its label directions. Keep the fabric visibly wet for the stated contact time; wiping it dry too soon can undermine the process. Check seams and folds, where moisture and debris may collect. A rushed wipe can miss these spots. I have to remind myself that clean-looking fabric is not necessarily disinfected.

Place used wipes, gloves, and other contaminated disposables in the designated waste container, following your organization’s handling procedure. Do not overfill bags, and keep waste away from clean supplies. Then open doors or windows when conditions allow, and ventilate the vehicle before restocking or returning it to service. Use the vehicle’s ventilation system according to local procedures. Airflow matters. If a strong cleaning odor remains, pause and check the product instructions rather than masking it with fragrance.

Verify Contact Times and Wear Appropriate Protective Equipment

After transporting a patient, disinfect high-touch areas in the medical emergency vehicle, including stretcher rails, door handles, seat-belt buckles, and equipment controls. Clean visible soil first; disinfectants may work poorly through blood, dust, or other residue. Use a product approved for the surface and intended setting, and follow its label. The stated contact time matters. Keep each surface wet for the full period, rather than wiping it dry early. A rushed pass can look complete while leaving corners untreated. Small details matter.

Tips: Set a timer after applying the disinfectant. Check seams, handles, and the undersides of rails. If a surface dries too soon, follow the label’s directions before reapplying. Do not guess.

Wear protective equipment suited to the task and product instructions. Gloves are commonly needed; add a gown and eye or face protection when splashes are possible. Use respiratory protection when the risk assessment or written procedure calls for it. Remove contaminated PPE carefully, avoid touching your face, and perform hand hygiene afterward. Requirements can differ by vehicle, product, and exposure risk, so follow your organization’s infection-control procedures. It is easy to assume that a clean-looking cabin is ready. It may not be. Check the contact time and coverage before returning the vehicle to service.

FAQS

Why should visible soil be removed before disinfection?

Blood, dust, lotion, and residue can block disinfectant contact. Clean the surface first with a compatible solution and fresh cloth. Small details matter.

Which areas need attention between patient transports?

Focus on grab rails, door handles, cot rails, buckles, monitor controls, microphones, and cabinet pulls. Check seams and handle undersides.

How should a cleaning cloth be used?

Fold the cloth to expose a clean section. Replace it when heavily soiled. Do not spread residue across nearby surfaces.

How long should disinfectant remain wet?

Follow the product label’s stated contact time. Keep the surface visibly wet throughout. Wiping too soon may reduce effectiveness.

Can cleaning products be mixed?

No. Never mix cleaning chemicals. Unexpected fumes or surface damage may result.

How should screens, cables, and electronic equipment be cleaned?

Follow the equipment instructions carefully. Use a damp cloth only when permitted. Avoid spraying near vents, screens, and electrical connections.

What should staff do with reusable medical equipment?

Remove visible soil before disinfection. Check material compatibility, dilution, and wet contact time. Never immerse electronics unless instructions allow it.

Can a checklist prevent every cleaning mistake?

No. A checklist reduces missed touchpoints, but it cannot replace judgment. Rushed handoffs still leave seams or buckles unchecked sometimes.

What should happen when an item remains visibly soiled?

Set it aside and seek guidance. Record the item, product, and completion time. Guessing is not a reliable cleaning method.

Conclusion

How to disinfect a medical emergency vehicle properly begins with preparing the vehicle and selecting approved disinfectants that are compatible with its surfaces and equipment. Remove visible dirt and other soil from patient-care areas before applying disinfectant, since cleaning first helps the disinfectant work effectively. Between patient transports, give particular attention to frequently touched surfaces, such as handles, rails, controls, and work areas.

Clean reusable medical equipment according to its care instructions, and handle fabrics and waste safely. Ventilate the vehicle as appropriate while cleaning and after disinfection. Follow each product’s stated contact time, keeping surfaces wet for the required period, and wear suitable protective equipment throughout the process. A consistent routine helps reduce contamination while protecting staff, patients, and vehicle materials.

Charlotte

Charlotte

Charlotte is a seasoned marketing professional with a deep understanding of the company's portfolio and a passion for elevating its presence in the market. With a keen eye for detail and a commitment to excellence, she ensures that our professional blog is regularly updated with insightful articles......